
Continuous Integration with PowerShell, TeamCity and Git
On Twitter I was following a conversation where someone said that he needed an easier way to publish PowerShell modules to the Microsoft PowerShell Gallery. His issue was that there were too many manual steps involved in publishing to the Gallery. Actually, publishing is really easy, but all those tests (Lint tests, Unit Tests, Script Guides, etc.) take some time to run manually. This is where automation helps.
This article will focus on the tools and the configuration used (in MY environment) to accomplish Continuous Integration.

Continuous Integration for PowerShell modules
If you haven’t yet heard of Continuous Integration (CI) then this Wikipedia article will give you a good overview of what is involved in CI: https://en.wikipedia.org/wiki/Continuous_integration
Continuous Integration is something Developers are already used to do for a long time (or should be at least) and companies or teams claiming to be (not do!) DevOps should also do CI, to an extent.
In a nutshell CI means that as a developer (You write PowerShell? You’re a developer!) you commit your code into Source Control (like git, bitbucket, TFS or VSO), that commit triggers a job (or pipeline) on your CI server (something like Jenkins, TeamCity, GoCD or AppVeyor). This job usually runs some Unit Tests (Pester), validates your code against scripting guidelines (PSScriptAnalyzer) and if all tests pass it will create a “build artefact” that then can be pushed to an artefact repository (like Nexus, Artefactory, NuGet or the PowerShell Gallery).
This build artefact can now be picked up by tools like Bamboo, Octopus Deploy, Ansible, Chef or Puppet.
PowerShell module good practices
In this chapter I don’t really want to talk about how to structure your PowerShell module, but just some things that I found over time that make it a lot easier to get your module through your build pipeline.
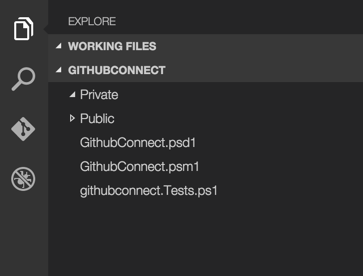
- add your test files to the source code
- githubconnect.Tests.ps1 is the script that gets automatically executed by our Pester step. (later more)
- use your IDE to trim whitespace from line endings
- most decent IDEs will have a function in them to remove whitespace. This will prevent some Code Styleguide checks from failing.
- I use VS Code for my development and use this extension.
- most decent IDEs will have a function in them to remove whitespace. This will prevent some Code Styleguide checks from failing.
- I’d recommend having a generic pipeline for your modules. Have a “policy” that says that your module needs at least the Pester test script.
- You either use one Source Code Repository for all your modules, each module is in its own subfolder, or have multiple pipelines where each pipeline monitors only one repository and builds only one module. Alternatively one could also add multiple VCS roots to a pipeline, if your CI tool supports that.
Continuous Integration pipeline structure
My basic CI pipeline is split into four stages:
- Preparation
- Here I make sure that the build agent is configured the way I need it to be.
- Validation
- In this stage all the tests are run.
- Build
- The artefact is created. In some special cases this stage might be empty or disabled.
- Upload
- The artefact is uploaded to the configured repositories. (NuGet, PowerShell Gallery, Artefactory, Nexus, etc.)
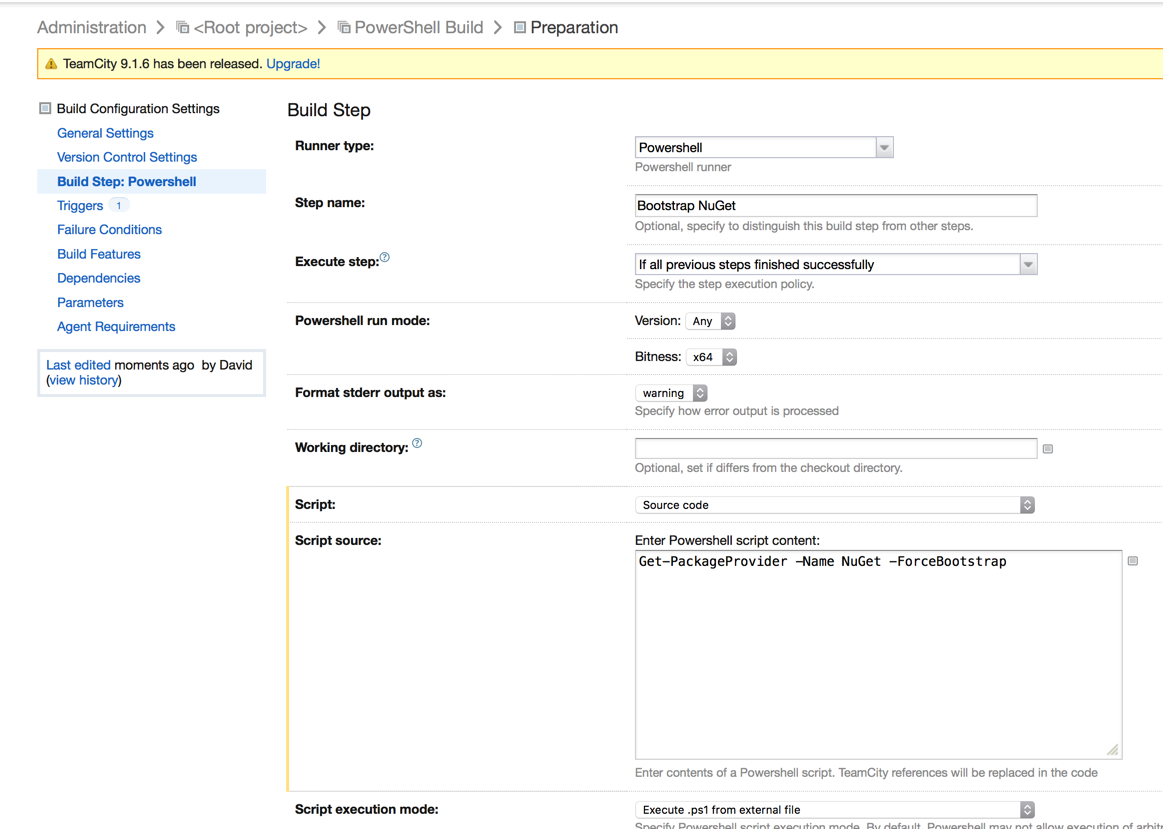
Preparation stage
This stage is special. This is the very first stage in my CI pipeline, it kicks everything else off. I mentioned that ideally Continuous Integration builds an artefact from every commit (at least from commits to your master or release branch in source control, however you do it). So we need to tell Teamcity that a commit to Source Control triggers the build. This is really easy, so I won’t show more than a screenshot here.
The actual action that gets executed is fairly dull. It uses the PackageManagement module to bootstrap nugget.exe onto your system, that’s it. Caveat: Your machine needs internet connectivity to download the executable.
Get-PackageProvider -Name NuGet -ForceBootstrap
Validation stage
The validation stage consists of two steps in my case.
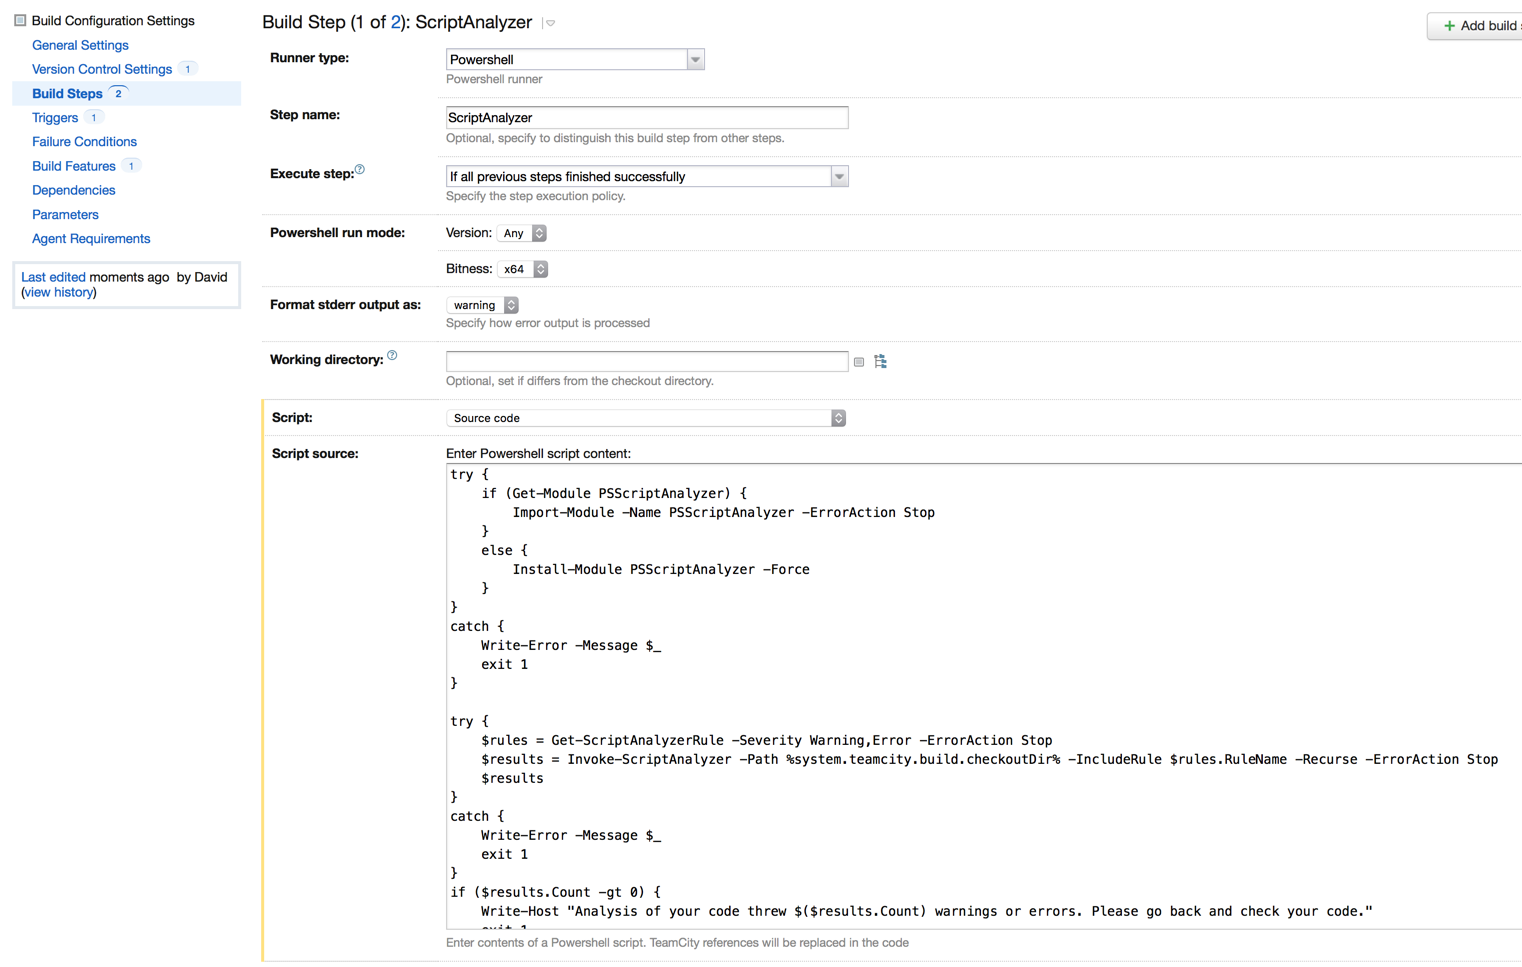
- ScriptAnalyzer
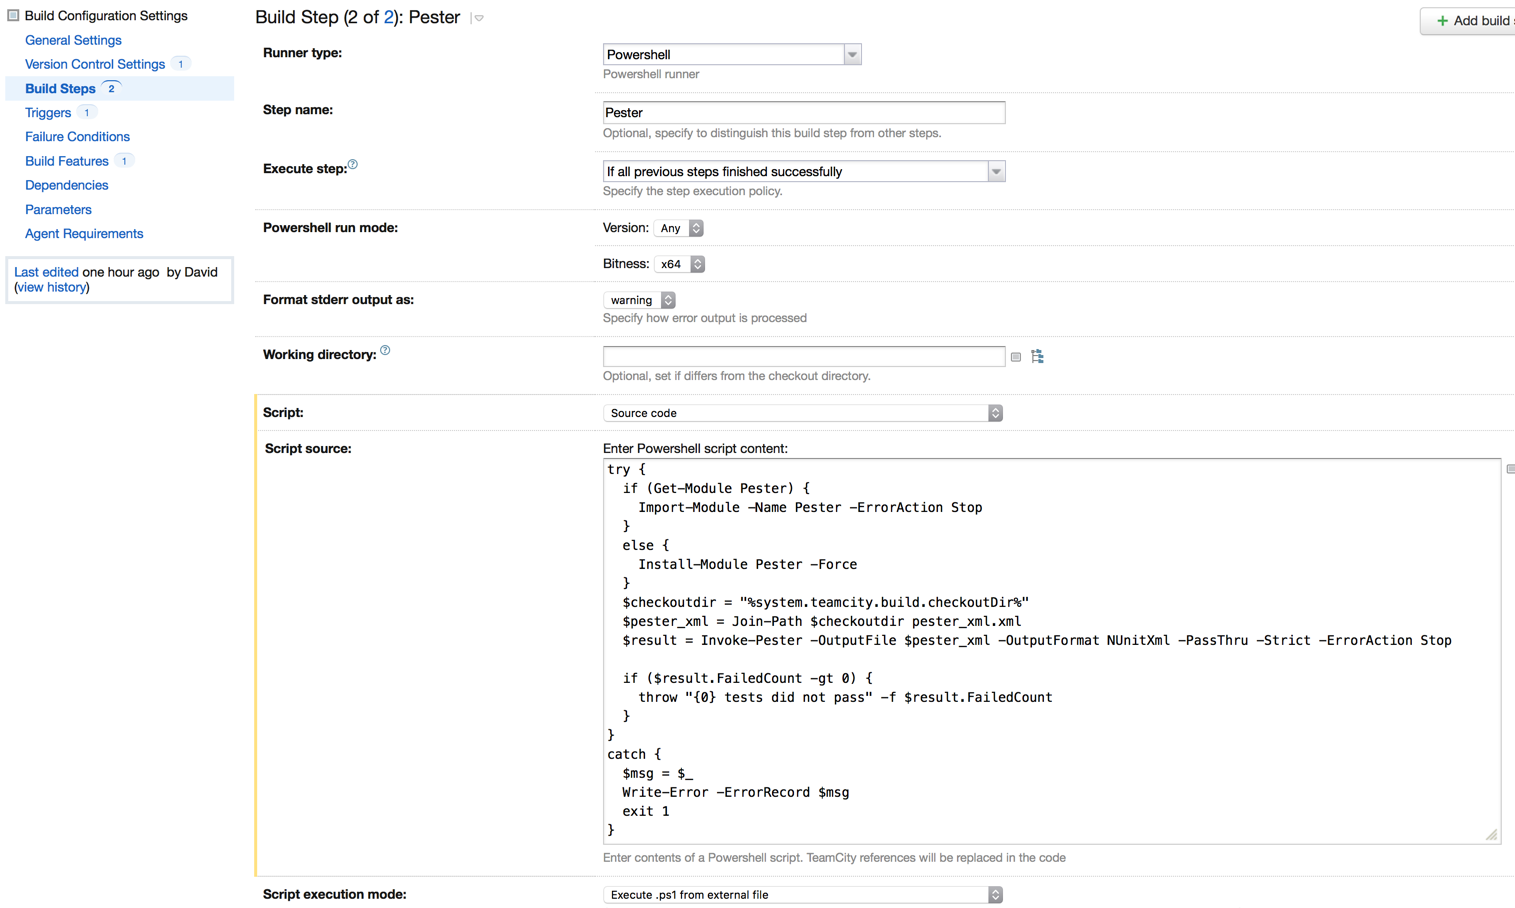
- Pester
The ScriptAnalyzer step runs the command “Invoke-ScriptAnalyzer” and checks if there are any obvious issues with code. We don’t have to add anything to our code in order to run these Style tests, those test definitions are built in to the PSScriptAnalyzer PowerShell module.
try {
    if (Get-Module PSScriptAnalyzer) {
        Import-Module -Name PSScriptAnalyzer -ErrorAction Stop
    }
    else {
        Install-Module PSScriptAnalyzer -Force
    }
}
catch {
    Write-Error -Message $_
    exit 1
}

try {
    $rules = Get-ScriptAnalyzerRule -Severity Warning,Error -ErrorAction Stop
    $results = Invoke-ScriptAnalyzer -Path %system.teamcity.build.checkoutDir% -IncludeRule $rules.RuleName -Recurse -ErrorAction Stop
    $results
}
catch {
    Write-Error -Message $_
    exit 1
}
if ($results.Count -gt 0) {
    Write-Host "Analysis of your code threw $($results.Count) warnings or errors. Please go back and check your code."
    exit 1
}
else {
    Write-Host 'Awesome code! No issues found!' -Foregroundcolor green
}
The code should be pretty self-explanatory. Only if there are neither Warnings nor Errors in my modules do I move on to running the Pester tests in the next step.
try {
  if (Get-Module Pester) {
    Import-Module -Name Pester -ErrorAction Stop
  }
  else {
    Install-Module Pester -Force
  }
  $checkoutdir = "%system.teamcity.build.checkoutDir%"
  $pester_xml = Join-Path $checkoutdir pester_xml.xml
  $result = Invoke-Pester -OutputFile $pester_xml -OutputFormat NUnitXml -PassThru -Strict -ErrorAction Stop

  if ($result.FailedCount -gt 0) {
    throw "{0} tests did not pass" -f $result.FailedCount
  }
}
catch {
  $msg = $_
  Write-Error -ErrorRecord $msg
  exit 1
}
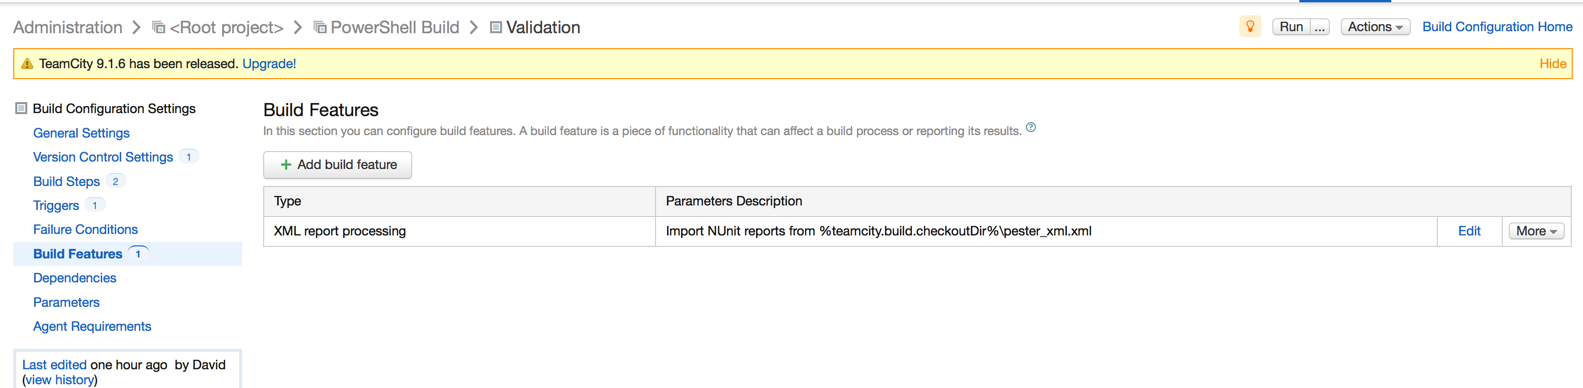
Just as with ScriptAnalyzer, if it’s not installed, TeamCity will make sure that Pester gets installed on the machine first.
Invoke-Pester will search all .Tests. files and execute them. We are also telling Pester to output to an XML file. Pester supports the NUnitXml format that TeamCity also understands and is able to interpret and visualise the results on the TeamCity website.
With these two steps have we already done quite a bit. Nice!
Build and upload
In the case of these PowerShell modules I am keeping my “Build” stage empty, as I can run the next step from my direct git clone. If you however decide to pack your PowerShell module into a NuGet package, a zip file or any other artefact type, then this Build stage would be the place to do exactly that.
The “Upload” stage is where I publish my artefact to the world for other systems to pick up and deploy from.
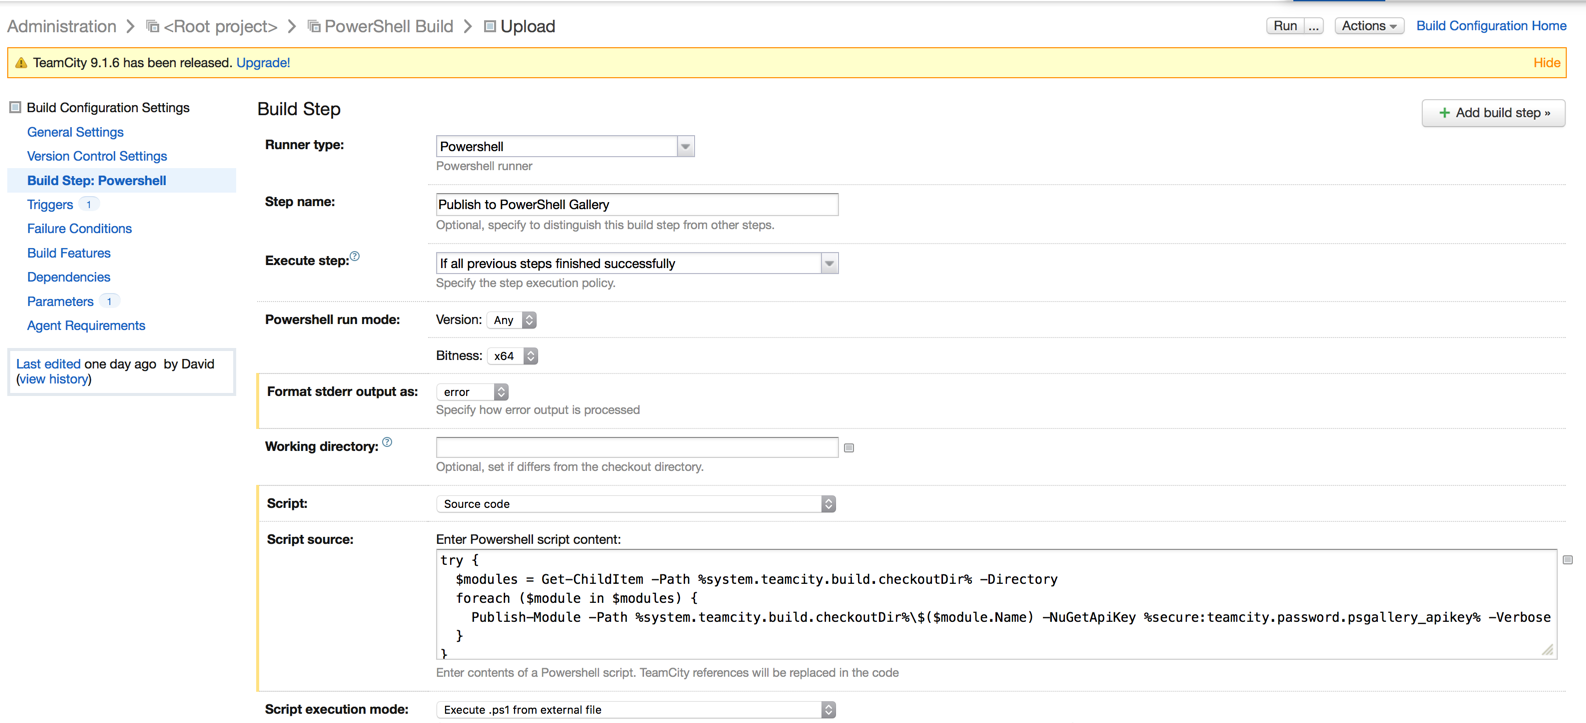
The magic happens with “Publish-Module”, which automatically creates a deployable artefact out of the PowerShell module and uploads it to the Microsoft PowerShell Gallery.
I obviously don’t want to put my PowerShell Gallery API Key into my scripts which is why I am using some TeamCity environment variables.
Summary
To sum this up I can show you a run of one build where the Pester Unit tests failed and where TeamCity notified me of a failed build.

With this configuration in TeamCity we achieved actual CI, Continuous Integration. Every time someone commits / checks-in code to our Git repository’s Master branch TeamCity will notice this change and trigger a job. If everything is fine then all we have to do is wait and after a successful run worry about deployment.
I hope this overview will get you started with configuring your own TeamCity pipeline / project for your PowerShell code. If not, hit me up on Twitter or here and ask.
Leave a Comment