Azure MFA - Enhanced Context with Number Matching
Multi-factor authentication (MFA) is one of the best ways to protect your identity in an online world. Microsoft even claims that using MFA blocks 99.9% of all automated attacks to your identity.
Lately however the industry has seen attacks on MFA protected accounts where attackers repeatedly send MFA prompts to end users in the hope that someone will eventually just approve the request, without looking at it too hard. These attacks are called “MFA fatigue attacks” and are regularly seen on Microsoft Office 365 accounts.
How are these attacks successful? Often MFA requests do not have enough context. You might not necessarily be told which application sent the request, or where (geographically) the request originated.
Azure MFA Number Matching
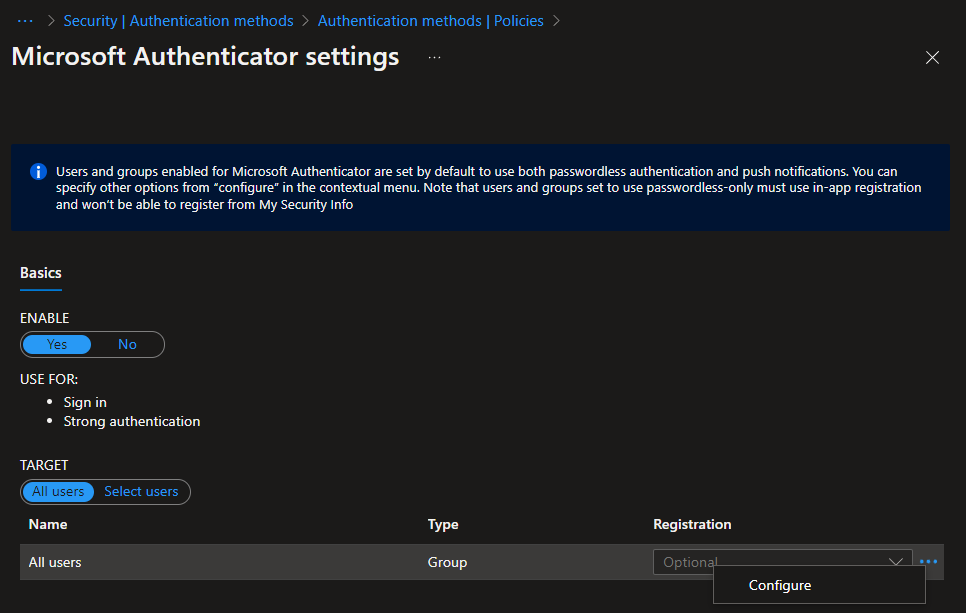
One issue with MFA has often been that I, an attacker, could open a browser, send a request, and the attacked person, without seeing the browser, could allow/grant my request. Azure MFA now has a new (currently in preview) feature that is called “Number Matching”. To enable this new feature (which seems to be for free), browse to the Azure AD portal and ensure the Microsoft Authenticator method is enabled. Either target this at “All Users” or a select group of users. To the right you can see three ... to open a context menu.
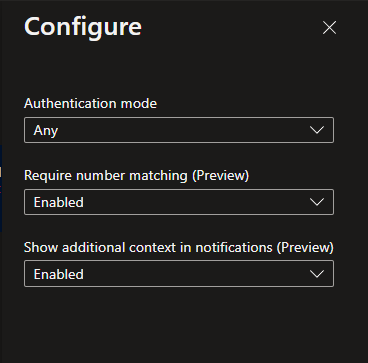
In this context menu you can configure a few things, mainly though to require number matching and to show additional context in notifications.
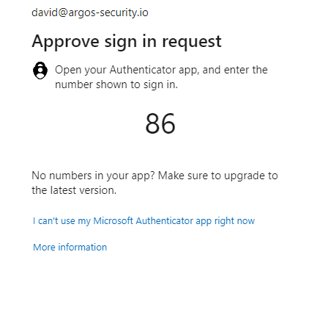
Once you have enabled both these settings, the next time a user logs in to their Azure AD / Office 365 account they will be prompted to type in a number in their Microsoft Authenticator app. They will only know that number, if they can also see the browser the request originated from. This means the “MFA fatigue attack” vector is almost eliminated, unless one can socially engineer a person to type in the number (which is certainly possible).
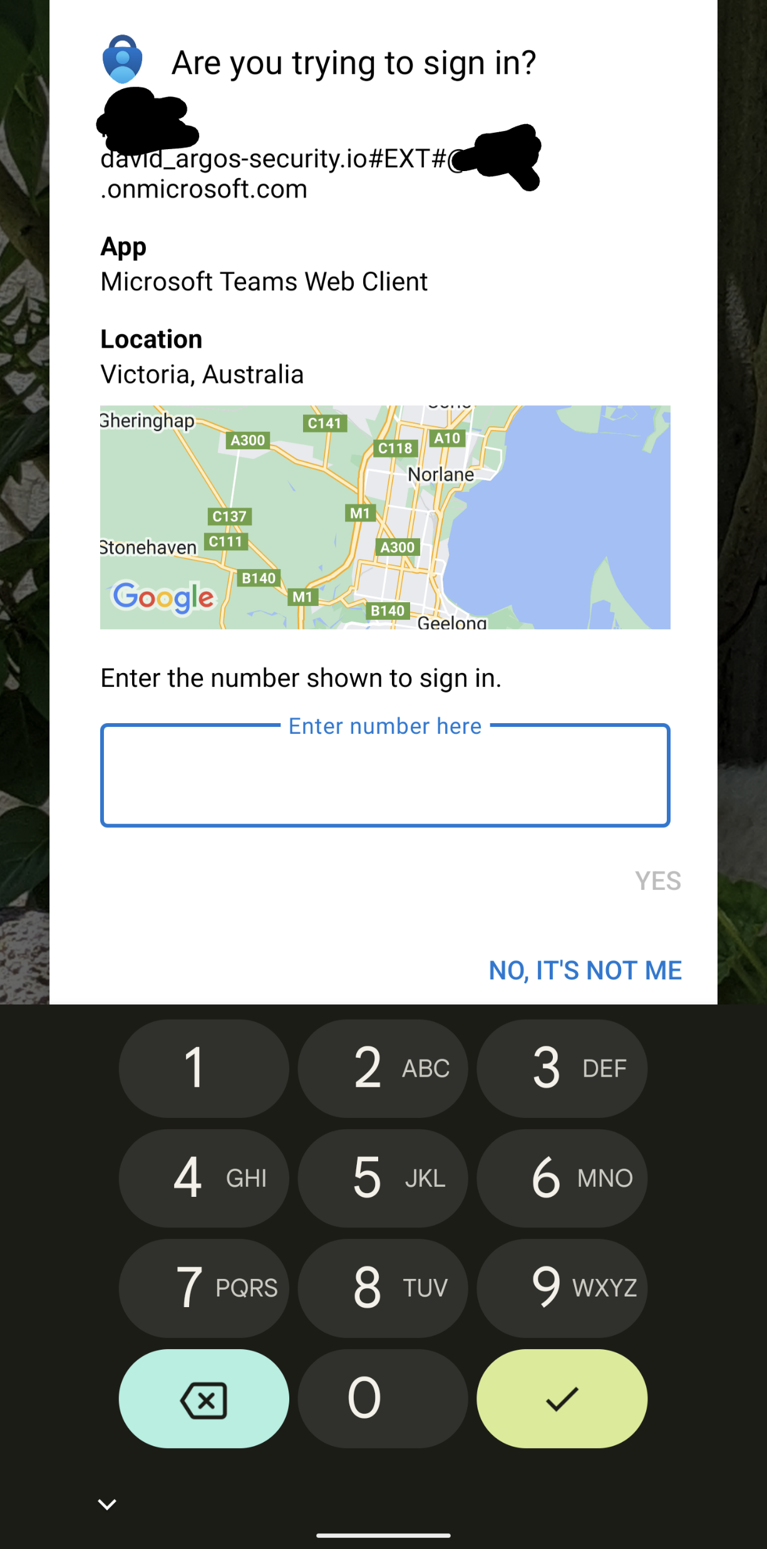
The additional context is another great security feature. The MFA prompt on the Microsoft Authenticator app will also show where in the world, based on the client IP, the request is coming from, in addition to which application initiated it.
In the end, it will look something like this.


