Getting started with Pulumi on Azure
Getting started with Pulumi on Azure
Pulumi? Someone the other day didn’t quite hear me right and asked “Haloumi?”. Well, I can’t blame them, Pulumi is still a new player, started in 2017 by two former Microsoft employees.
What does Pulumi do? Well, they took Infrastructure as Code VERY literal and developed their product also called Pulumi. If tools like ARM or Terraform are Infrastructure as Code then Pulumi is Infrastructure as real Code with support for quite a few programming languages already, mainly Javascript and Typescript (using the nodejs runtime) in a stable release, and Python and Go as a preview release.
This means we are getting out of YAML hell or the need to know “yet another DSL”.
Pulumi is currently on version 0.17.1, it’s open source hosted on GitHub under the Apache 2.0 license and has very frequent releases.
Support for Azure
Pulumi has some great support for Azure and it is super easy to get started, as the “barrier to entry” is really low.
Local installation
For this article I will assume the following things:
- local OS is Windows 10
- we will use NodeJS
- you have an existing Azure subscription
- you have already created an account on https://pulumi.com
If you use a different OS or want to use Python or Go, be my guest, it’ll be easy for you to follow.
You should also have already installed the NodeJS runtime on your machine, that way writing the InfraCode will be super easy.
Next thing is installing the actual Pulumi CLI. You can find the process for that on the official Pulumi website. I personally installed Pulumi into a docker container that I run on my machine, and I recommend you do the same, but in the end it’s up to you.
First Pulumi project
Before we write any code we need to create a Pulumi project. A project is a directory which stores the Pulumi.yaml file. Yes, a yaml file, however, it’s “just” a definition file, not much more.
We can use the Pulumi CLI to create the project and select our runtime. Alright, my local development directory is called c:\dev\pulumi, so inside that directory I execute
pulumi new
This will load a list of templates to choose from. I will select the azure-javascript template and follow the prompts.
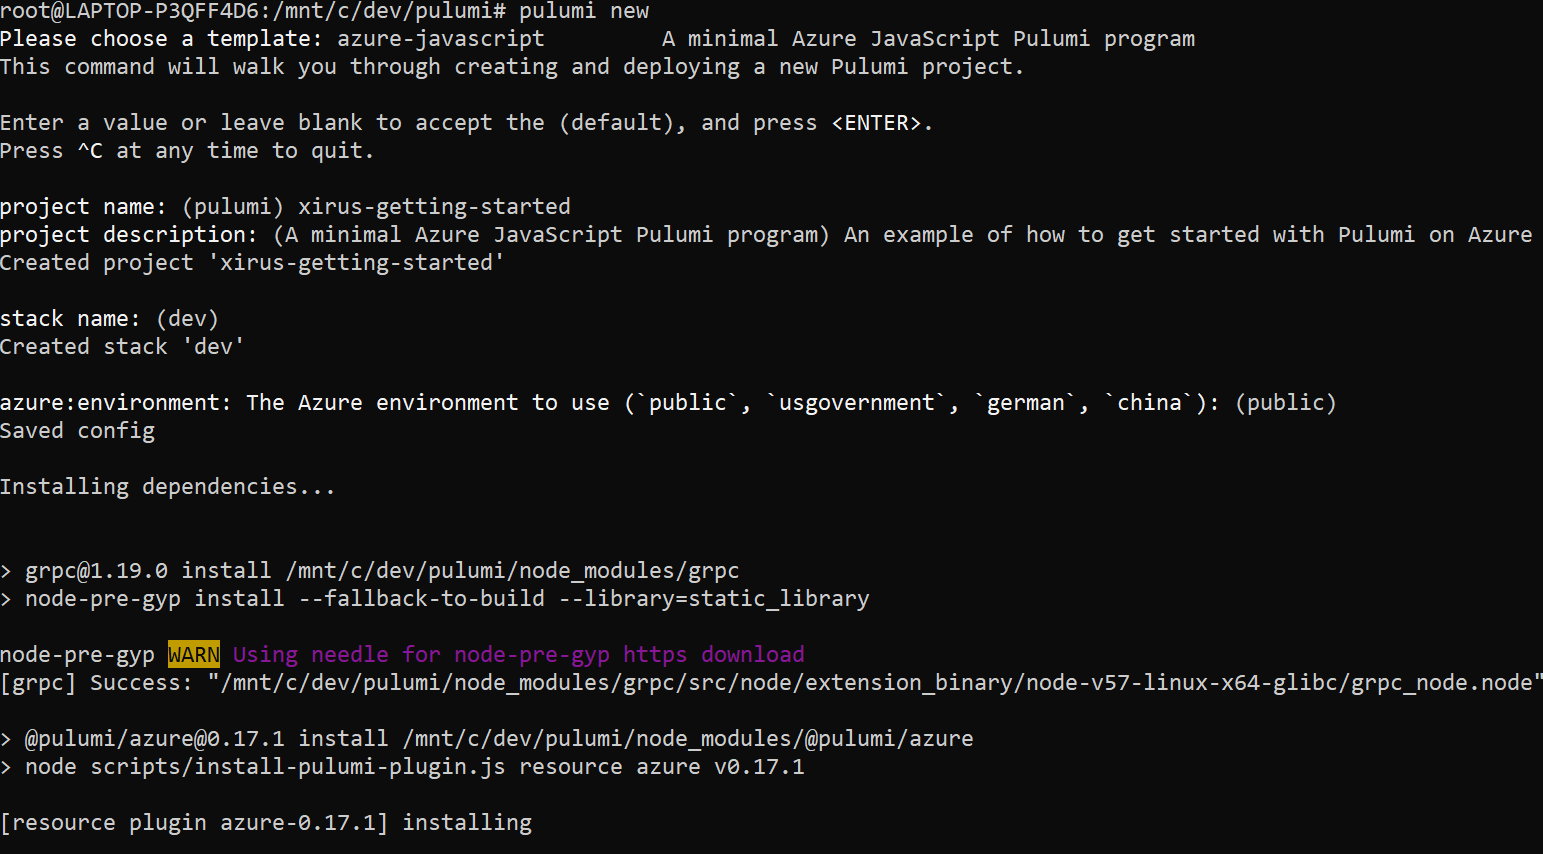
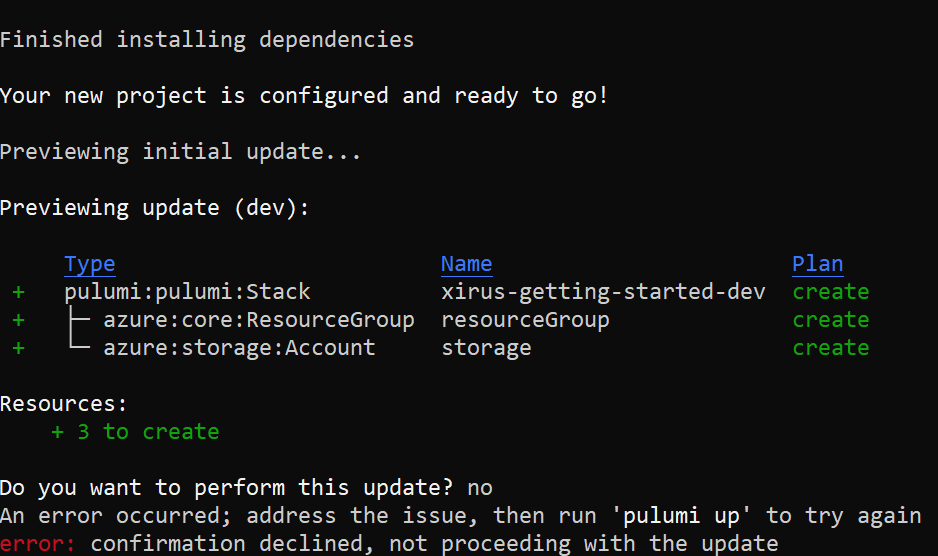
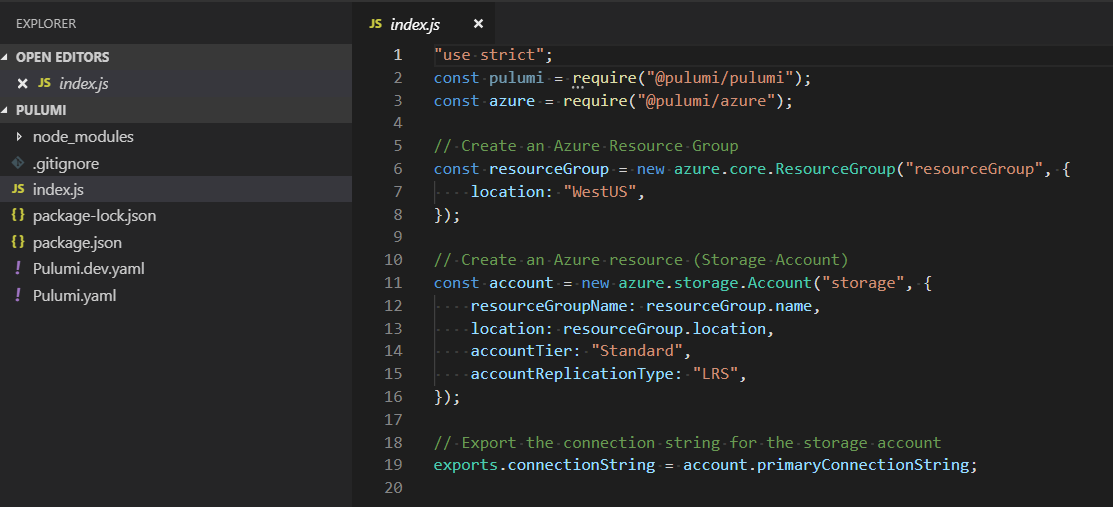
The command will eventually pause and wait for our input. The template also created a template index.js file with two resources in it, a Resource Group and a Storage Account. Let’s say no for now.
When opening the local directory in our favourite IDE VS Code then we can see the following:
Pulumi on Azure
If you have any sort of programming background, javascript, C#, python, PowerShell, any, then you won’t have any issues getting used to developing your Pulumi code. To get started on Azure we already have all the prerequisites installed by selecting the azure template. This automatically installed the @pulumi/azure npm package into our local node_modules directory, so we don’t have to take care of that and we can start writing our code straight away in index.js.
You can easily see how resources get created and referenced. In the case of Azure all resources are created from the azure object. So creating a new Virtual Machine is as easy as starting to type and essentially following the Intellisense of our IDE.
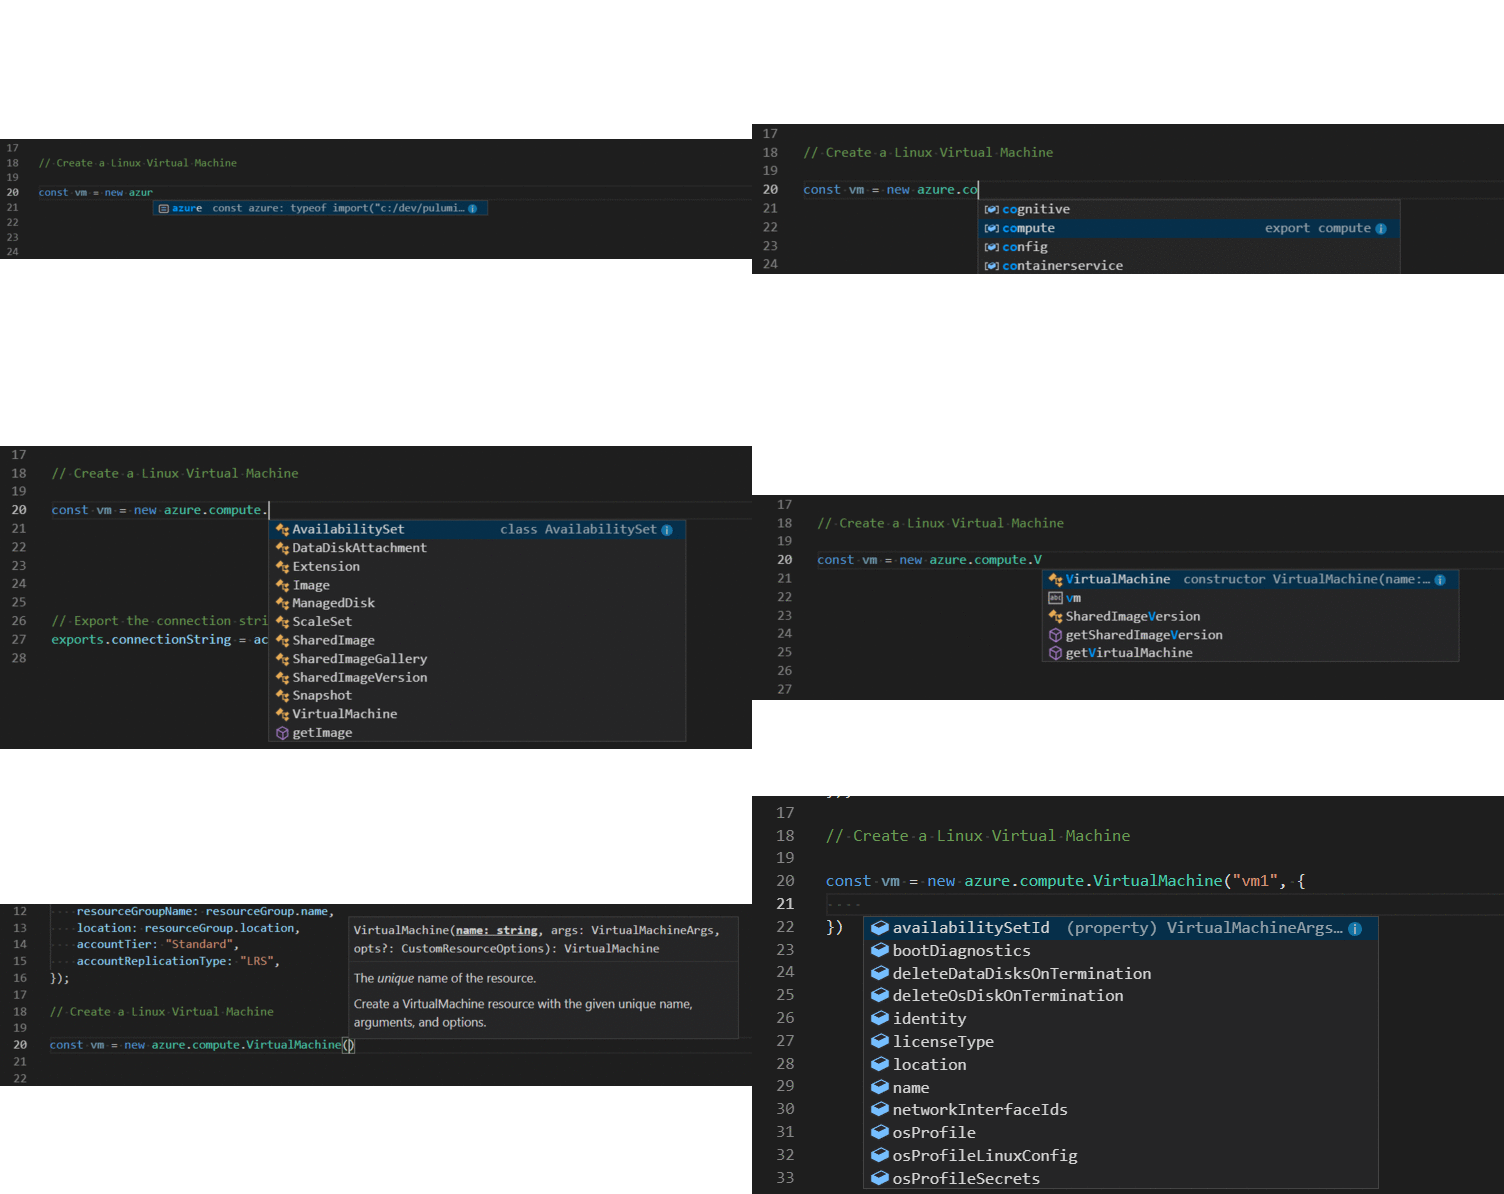
For this first step to Pulumi I will stick to our template though. Creating more complex resources will be the topic of the next article.
Pulumi State
Before we deploy this code we need to talk about state. Pulumi stores state, fortunately though, you don’t have to worry about that state. It’s stored on the Pulumi side so you don’t have to go and create Storage Accounts that aren’t part of your infracode or hacked into it after the fact. That said, if for whatever reason you want to manage your Pulumi state you can absolutely store it in your own environment.
Pulumi will always tell you, based on what it knows and what Azure tells it, what it has deployed and what your changes to the project will mean if they get deployed. Sort of like your terraform plan.
Deploy the Pulumi code
In order for Pulumi to be able to write to the state file we will need to first log in with pulumi login. This will either open up a browser where we log in to our Pulumi account, or we can also paste an access token in that we could’ve created previously in our account. Either way, once logged in, we’re ready to go.
The azure provider can be configured in a few ways to authenticate to Azure, the most common way is likely going to be “from the environment” where something else has already run az login (or the PowerShell equivalent) and retrieved AzureRM access tokens. Alternatively, users can also configure the azure provider with SPN details.
Make sure you run
az account set --subscription <subscriptionName or ID>if you have access to more than one subscription!
pulumi preview will show us all the changes a deployment will make. A preview always happens and is also available online to review, which is great for good CI practices.

pulumi up will again create a preview for us and will then ask us if we want to perform the update, want to cancel or maybe see more details. Selecting yes will execute the deployment and update the online state. pulumi up --yes would have skipped the question post preview. You will want to use this in your release pipeline.
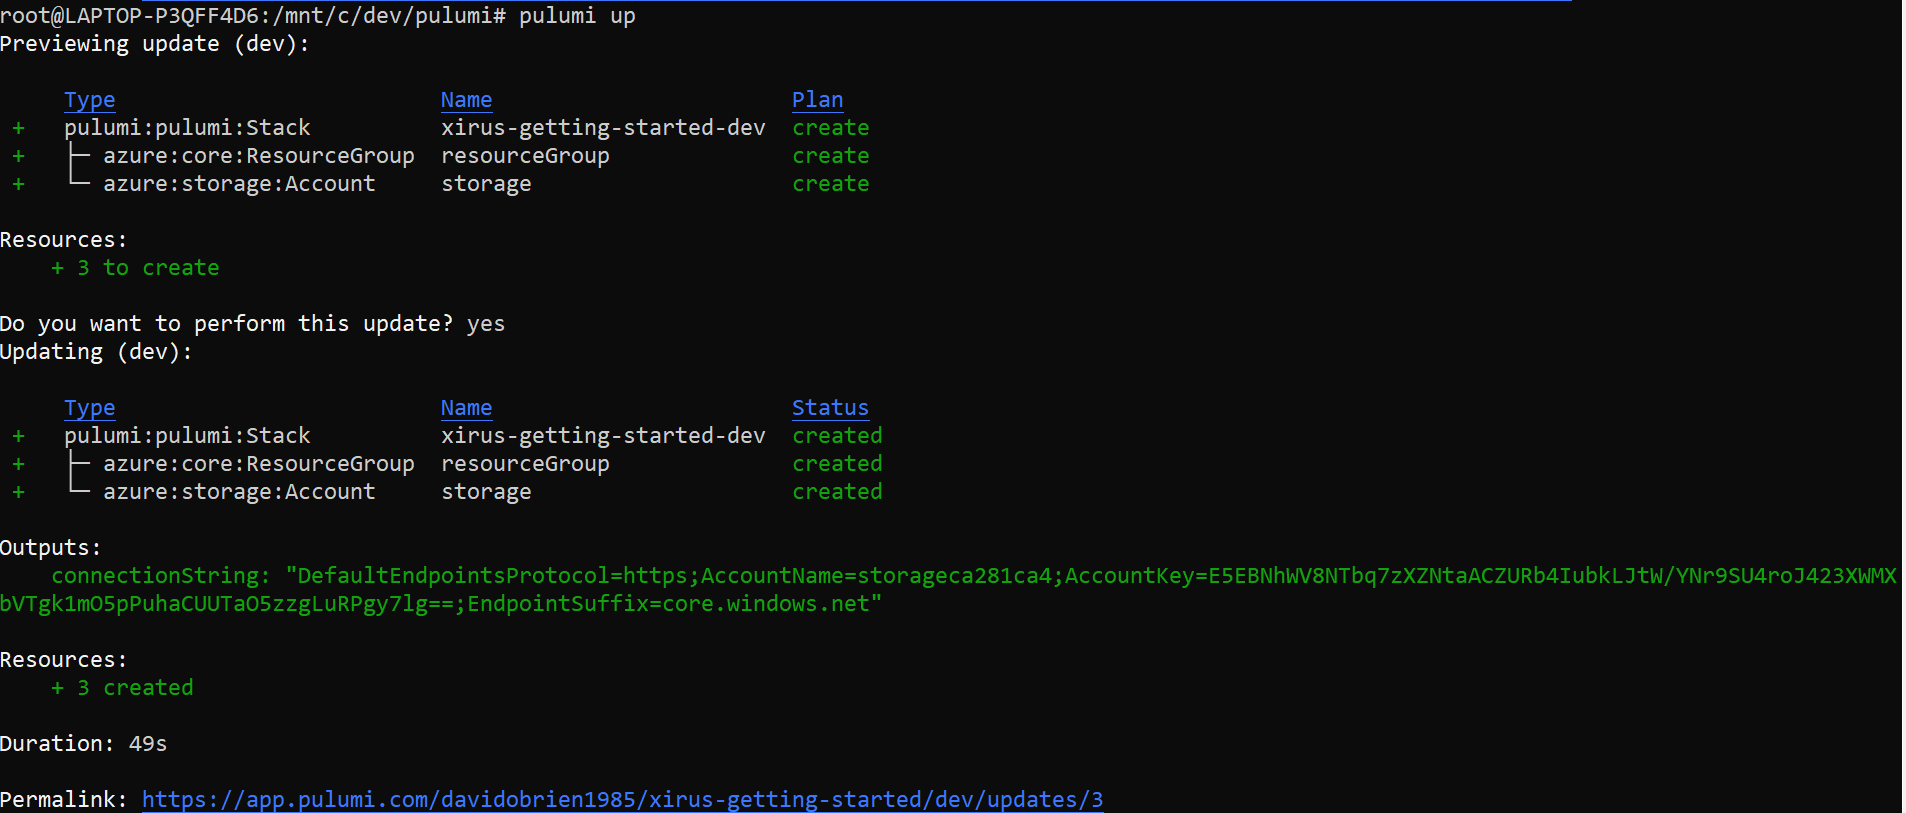
This has now created our Pulumi stack and created a Resource Group and a Storage Account. In my opinion the code used was more than easy and as we will see going forward is very easy to extend on.
pulumi destroy will obviously then delete the stack again. Please do so, as I don’t want to be the person responsible for your incurred cost ;-)
Summary
So, after my previous experiences with Terraform (see my earlier articles) and ARM I have to say I am really liking Pulumi.
No, I am not your typical developer, I wouldn’t even call myself a developer, but I’m very open to tools that will make my life A LOT easier when it comes to infrastructure as code. Leveraging actual established programming languages we are able to also use established practices and now finally apply them to our infracode, like linting, testing, creating modules, publishing these modules etc.
Pulumi already has quite the following and there are already people working on enabling other programming languages based on dotnet for example.
Would you like to read more about Pulumi on Azure? Let me know in the comments or on Twitter @david_obrien.
