
Building images on AWS with Packer - the new way
Building custom images on AWS
For a very long time people have built custom images for cloud consumption with the help of Packer. Packer is an open source tool that works across multiple platforms like Amazon Web Services (AWS) and Microsoft Azure.
For just as long users on AWS relied for some customisation of those Elastic Cloud Compute (EC2) instances on a service being present called the EC2Config service. That service was used to control the machines Computername, the administrator’s password and other things, see here for more info: http://docs.aws.amazon.com/AWSEC2/latest/WindowsGuide/UsingConfig_WinAMI.html Now with the introduction of Windows Server 2016 Amazon Machine Images (AMI) AWS has changed this quite a bit, and contrary to what they usually do, this is a breaking change.
Good bye EC2Config - Hello EC2Launch
In October 2016 AWS announced that Microsoft Windows Server 2016 is now available as AMIs through the AWS marketplace for users to use on EC2. With that announcement they also announced that EC2Config is gone.
SSM Agent – An upgraded version of our SSM Agent is now used in place of EC2Config. Read the User Guide to learn more. Problem with that announcement, in my opinion, is that EC2Config is not being replaced by the SSM Agent. The SSM Agent provides a whole different set of functionality to the user. Don’t get me wrong, it’s really awesome functionality, but not what I am after when building images with packer.
During a packer build process packer spins up a new / temporary EC2 instance that one can then execute custom code on before sysprepping the instance and then creating a new AMI of it.
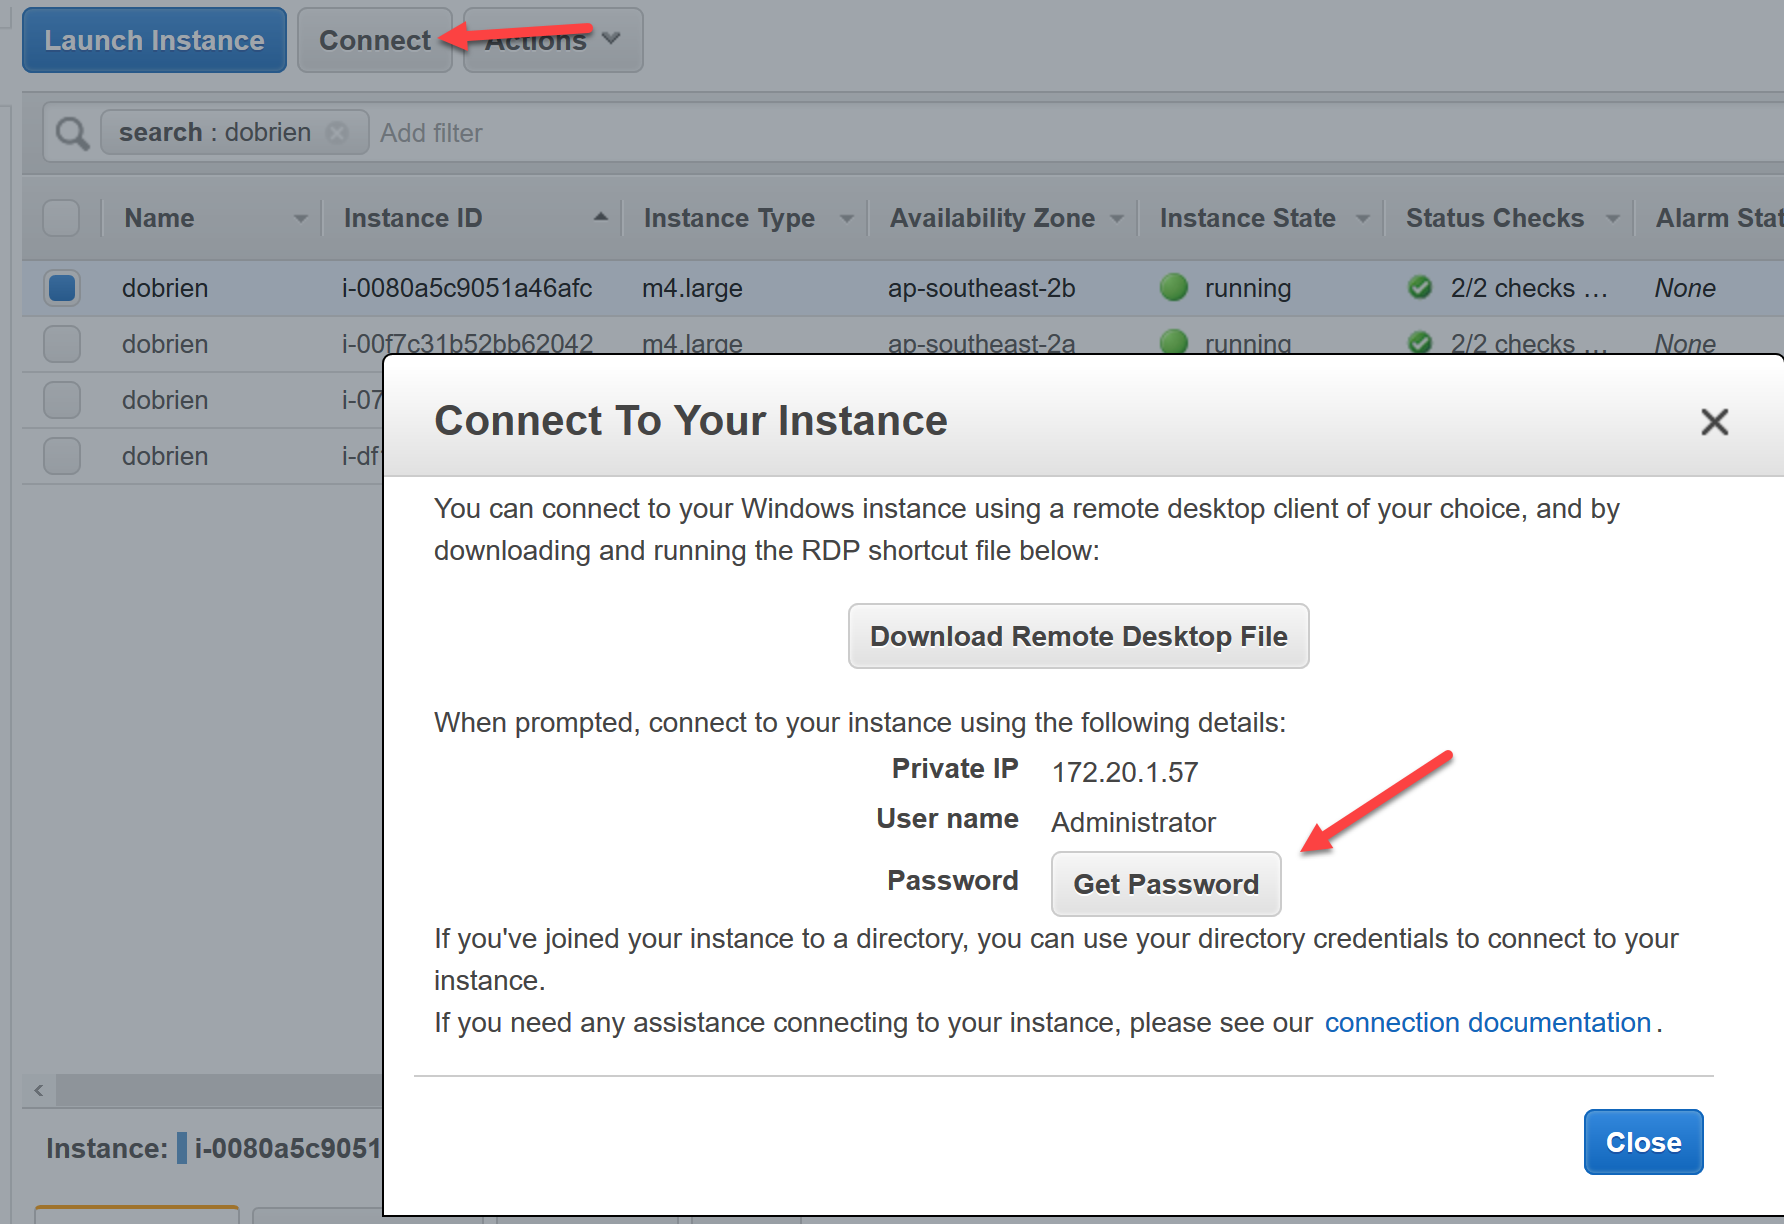
The next step would then be to create new instances from this custom AMI, however, in order to connect to these new instances you need the Windows password. The EC2Config service was used to establish a communication between the instance and AWS to tell AWS this Windows administrator password. A user was then able to use the AWS EC2 console or APIs to retrieve this password and connect to the instance.
In order for the new EC2 instance to know that it is supposed to randomise the Windows administrator password it needs to be told and this used to happen via the EC2Config service’s config.xml (C:\Program Files\Amazon\Ec2ConfigService\Settings\Config.xml)
Now on Windows Server 2016, all this has changed. Checking above location you won’t find anything anymore. Instead, after some digging around on the new Windows Server 2016 AMIs and with the help of a colleague we were able to find the EC2Launch executable, which now no longer runs as a service (that’s now the SSM Agent).
Get-Service -Name AmazonSSMAgent

Status   Name               DisplayName
------   ----               -----------
Running  AmazonSSMAgent     Amazon SSM Agent
The EC2Launch executable and supporting scripts and files can now be found in the following location: C:\ProgramData\Amazon\EC2-Windows\Launch
Building packer AMIs for Windows Server 2016
If you now want to build custom AMIs for Windows Server 2016 with packer then EC2Launch is your only way forward. The executable will not be very helpful for you, so I’ll just skip that one. It looks exactly like EC2Config in case you were wondering and it is located in C:\ProgramData\Amazon\EC2-Windows\Launch\Settings\EC2LaunchSettings.exe.
EC2Launch is now rather a collection of PowerShell scripts that take over some of the functionality that EC2Config used to do. It is configured via a collection of json files that configure the instance for next use.
Setting an AWS EC2 administrator password with EC2Launch
For most common tasks during a packer build process the following file will be the one to look out for: C:\ProgramData\Amazon\EC2-Windows\Launch\Config\LaunchConfig.json To programmatically read and edit this file in PowerShell you can use the following code snippet as an example:
$launchConfig = Get-Content -Path C:\ProgramData\Amazon\EC2-Windows\Launch\Config\LaunchConfig.json | ConvertFrom-Json
$launchConfig.adminPasswordType = 'Specify'
$launchConfig.adminPassword = 'P@ssw0rd123'
$launchConfig

Set-Content -Value ($launchConfig | ConvertTo-Json) -Path C:\ProgramData\Amazon\EC2-Windows\Launch\Config\LaunchConfig.json
This would set the administrator password to a known value and report that back to the AWS APIs, in an encrypted form of course. If this is an acceptable way of doing it or maybe just use the default behaviour (I would recommend the default, random) is up to you. Be aware that until the password has actually been set (see further down) that the password will be available in clear-text in this file.
The documentation for EC2Launch is quite hidden (to me at least it was), but once you find it, quite good. http://docs.aws.amazon.com/AWSEC2/latest/WindowsGuide/ec2launch.html
By default it will be okay to not edit the LaunchConfig.json at all and use the defaults. In that case AWS will manage the admin password, randomise it and forward it to the AWS console and API as we have all been used to in the past.
The way one executes this is now different though. As mentioned it is now a collection of PowerShell scripts and in the case of creating a new packer AMI you will need to add the following lines to the end of your packer JSON file.
{
  "type": "powershell",
  "inline": [
    "C:\\ProgramData\\Amazon\\EC2-Windows\\Launch\\Scripts\\InitializeInstance.ps1 -Schedule",
    "C:\\ProgramData\\Amazon\\EC2-Windows\\Launch\\Scripts\\SysprepInstance.ps1"
  ]
}
Update (11/07/2017)
After getting some comments on this article I also now run into the issue that running the second script (SysprepInstance.ps1) in packer breaks my packer. After some research I would discourage people from using the “find & replace” method. It does work, for now. However, AWS has added a parameter (a switch actually) to the script. So, if you want to run packer to create AMIs then please use this snippet instead of the above:
{
  "type": "powershell",
  "inline": [
    "C:\\ProgramData\\Amazon\\EC2-Windows\\Launch\\Scripts\\InitializeInstance.ps1 -Schedule",
    "C:\\ProgramData\\Amazon\\EC2-Windows\\Launch\\Scripts\\SysprepInstance.ps1 -NoShutdown"
  ]
}
I have tested this against Windows Server 2016 base AMIs.
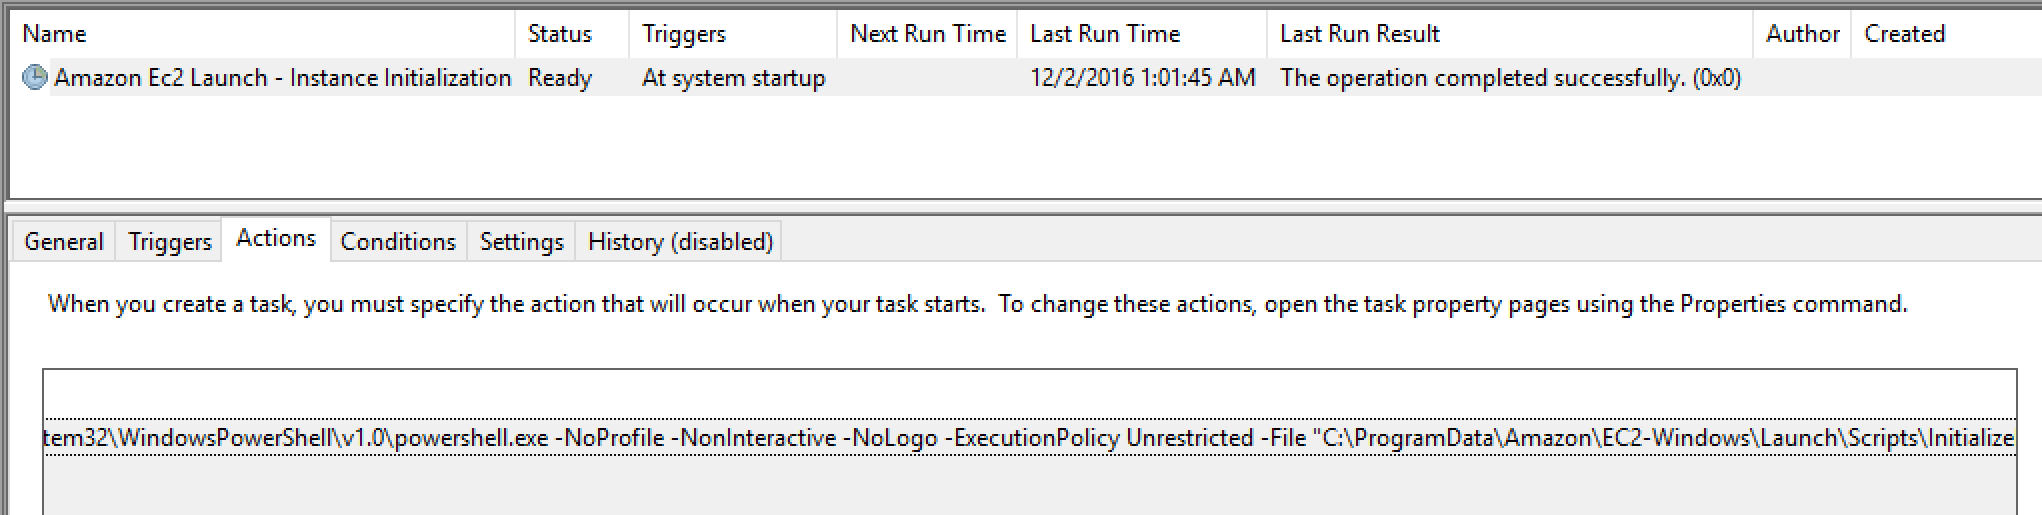
The first script will create a Scheduled Task on the instance that is configured to launch on next OS launch (mind the -Schedule), read the launchConfig.json and execute whatever that file tells the script to do. That Scheduled Task will only execute once and never again.
The second script will execute sysprep before shutting down the instance using an AWS provided unattend.xml which can be found in C:\ProgramData\Amazon\EC2-Windows\Launch\Sysprep. If you want to use your own custom XML file then just drop yours into that location.
The process to change the other settings is just like changing the password. Configuration like enabling Cloudwatch on an EC2 instance however has now also changed and will be covered in a following article.
I highly encourage everybody to run their packer builds (or whatever other tool you use to build custom AMIs on AWS) and check if they all still work.
Leave a Comment