XenDesktop automation with Powershell (for beginners)
Since XenDesktop 5 is around I began working with Microsoft’s PowerShell (I know what you’re thinking…“what? THAT late?”) And it’s been really easy to learn it because of XenDesktop’s integrated ‘script editor’ which translates all the stuff you’re doing in the console into the appropriate Powershell commands.
The thing with XenDesktop 5 is now, that you can do quite a lot inside the Desktop Studio, like creating machines, assignments and such, but you can do lots more with a little help of your (maybe soon to be) friend named Powershell.
Like, have you ever tried assigning a catalog to an IP address or ever wanted to change the minimum number of idle desktops in a desktop group? Those things can only be done with Powershell.
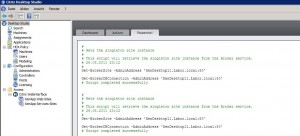
By opening Desktop Studio we are presented with three default registers at the top of the console: Dashboard, Actions and Powershell.
Everything you change, create or delete will eventually come up in there. Just try a bit around and have a look at a sort of history of what you’ve done.
By clicking on the Powershell button on this page you open up a shell which already has the Citrix cmdlets imported and you can instantly go and play around.
Or maybe you’re already an advanced user who wants to go ahead and use his own scripts to create Desktop groups or do some maintenance tasks, then you’ll need to import all the XenDesktop cmdlets into your Powershell.
Here’s how:
If you now enter Get-Module -Module Citrix.* you’ll get all the available cmdlets. You can find an overview of them at Citrix’s site: http://support.citrix.com/static/kc/CTX127254/help/
One could also go and add these to his/her own Powershell profile. For those, look here: http://msdn.microsoft.com/en-us/library/bb613488(v=vs.85).aspx
btw my most-used commandline is: Set-BrokerDesktopGroup -Name %DesktopGroupName% -InMaintenanceMode $True


Leave a Comment